
Turntable animations
What is a turntable animation?
A turntable animation involves the product or camera spinning around the z axis to provide a 360 view of the asset.
Purpose
Animation, when done well, is a powerful tool. Providing a client a 360 view of a product cements the product/concept in reality, while highlighting details that can’t be captured within a static image.
Asset rotation
When only the model is rotating in an animation, the light can shift around the asset highlighting its form from different angles. It’s quite dynamic when done correctly and can accentuate interesting details on an asset.

1. Create an axis that the asset will revolve around. [Shift + A] Add an empty axis. (Empty > Axis).
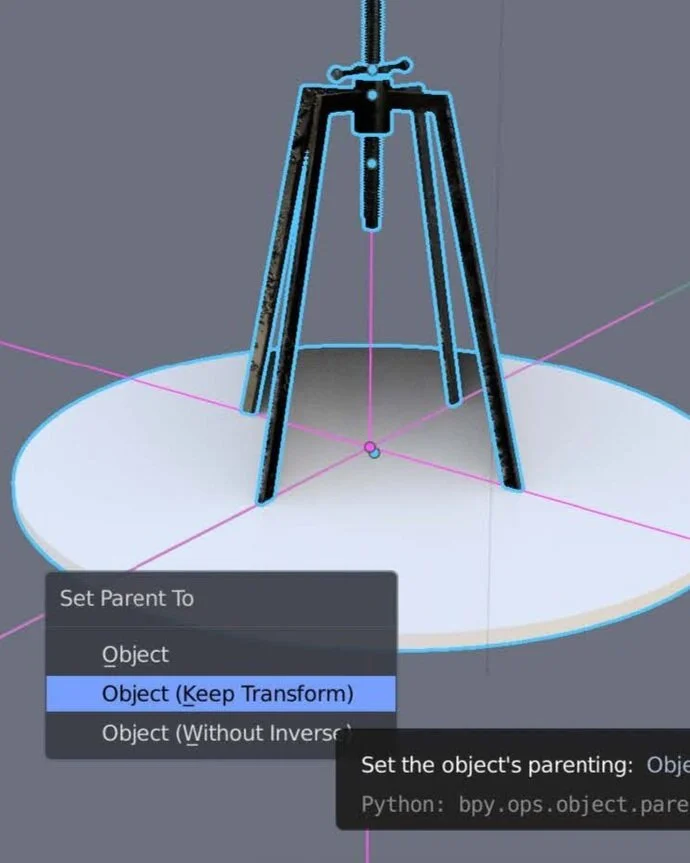
2. Set empty axis as the parent to the asset. [Ctrl + P] Select Object (Keep Transform) to lock the objects in the correct configuration when rotating.
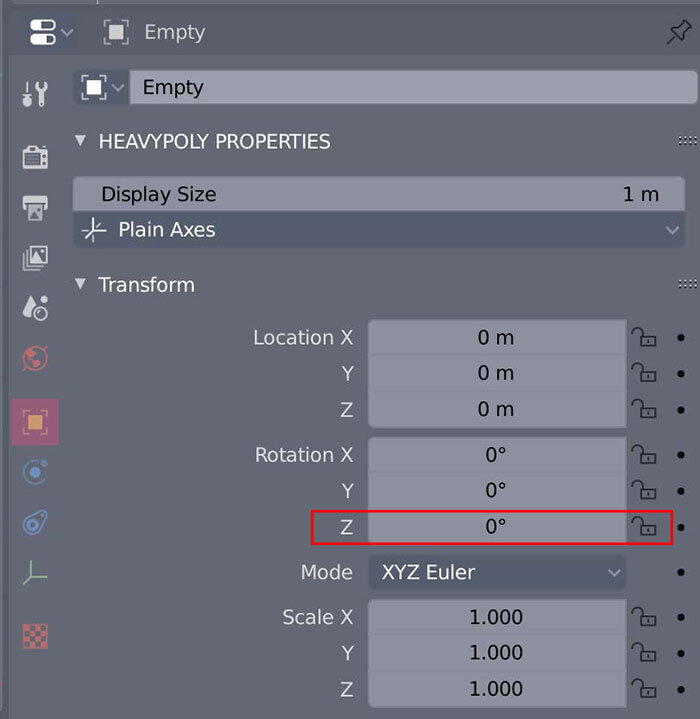
3. With the empty axis selected in the 3D animation tab, set the rotation path within the object properties. Add a keyframe by right clicking the rotation z axis and selecting Insert Keyframes.

The Dope Sheet at the base of the section acts as a navigation port to show what frame the animation is currently displaying.
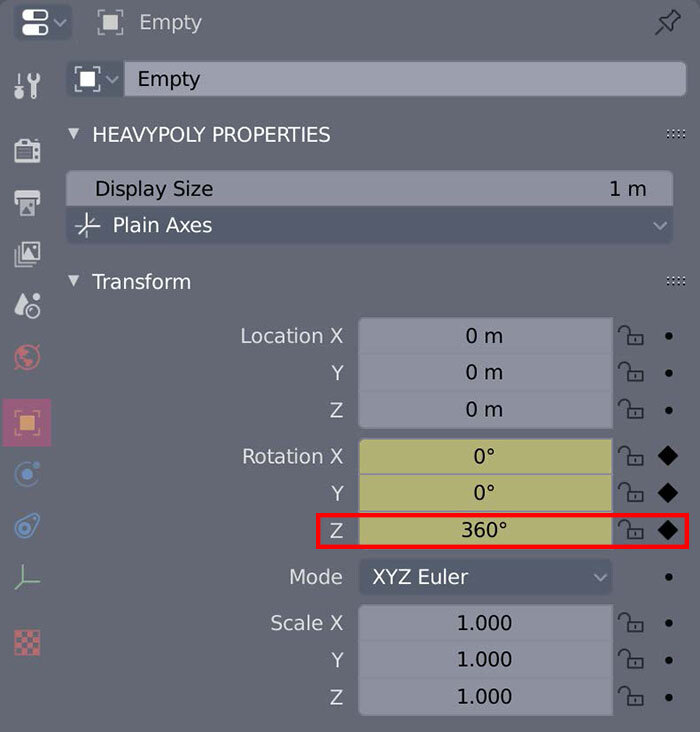
4. Set z rotation to 360 at keyframe 101. Change z rotation value to 360. Add a keyframe by right clicking the rotation z axis and selecting Insert Keyframes.
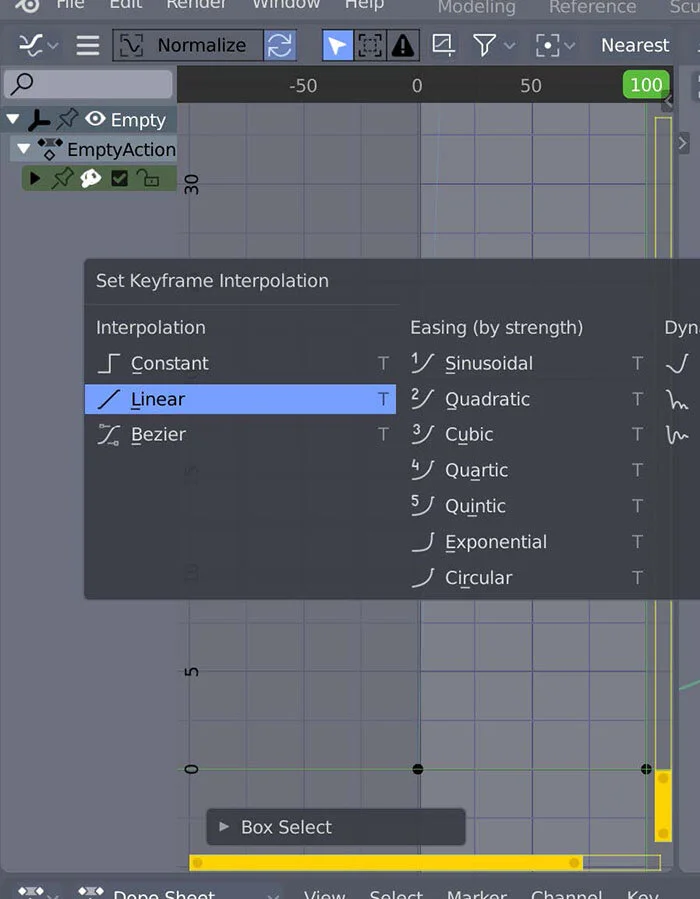
5. Set keyframe interpolation to linear. Open Graph Editor under Editor Type. [T] Set Keyframe Interpolation to linear to maintain constant speed.
Camera rotation
Camera rotation animations are the more cinematic of the two styles. The aim is to utilise curves to create a custom path for the camera to follow.
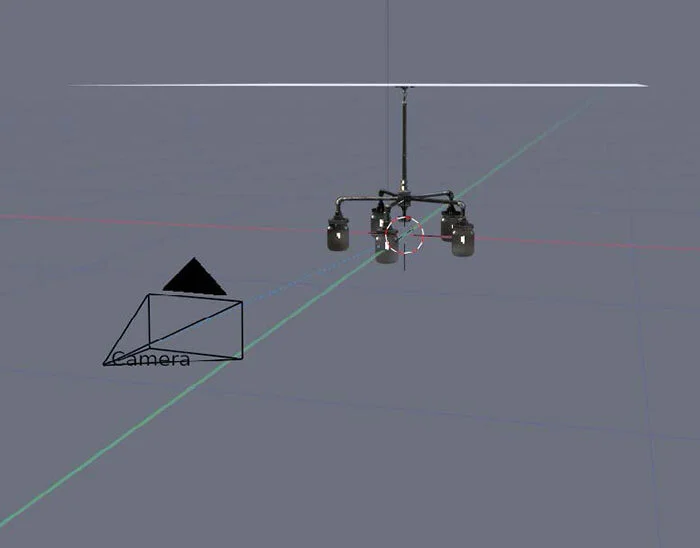
1. Set up camera in desired position. [Shift + A] Add a camera into scene. [V] View camera.
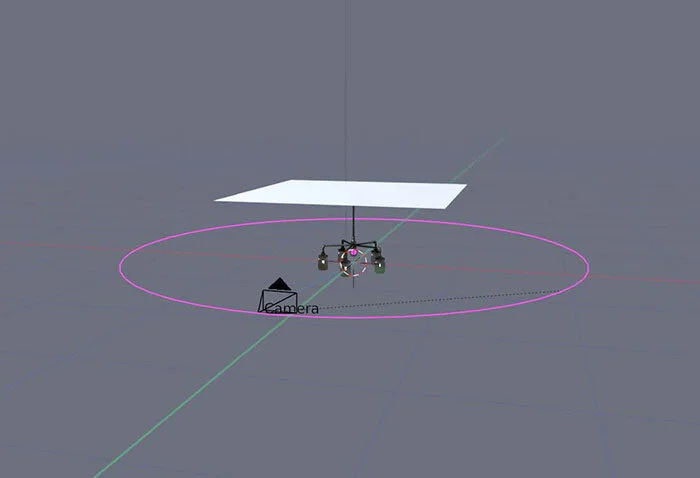
2. Add camera path. [Ctrl + P] Add a Curve Circle (Curve > Circle). [S] Scale to camera vertex.
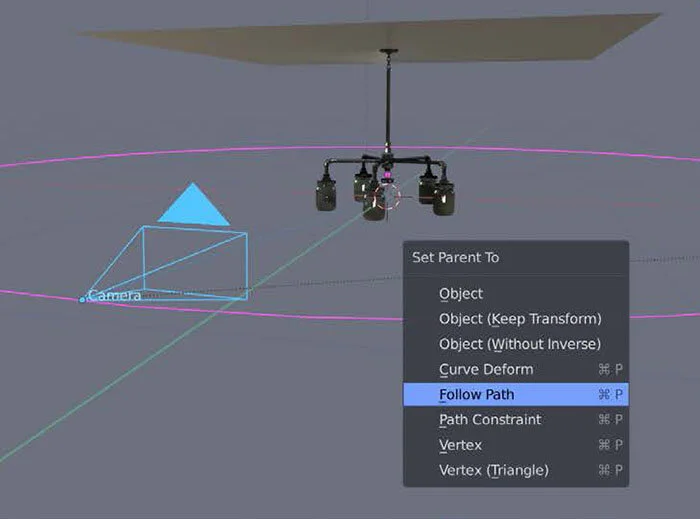
3. Parent path to camera. [Ctrl + P] Select Follow Path.

4. Create a target for camera to lock to. [Ctrl + A] Add empty axis. (Empty > Axis). Move to where the camera will focus.

5. Constrain camera to target. Add a Track To constraint using the object constraint property panel while the camera is selected. Set the empty axis as the target while changing the To: orientation to -z and Up: to y so that the camera viewport can see the empty axis.
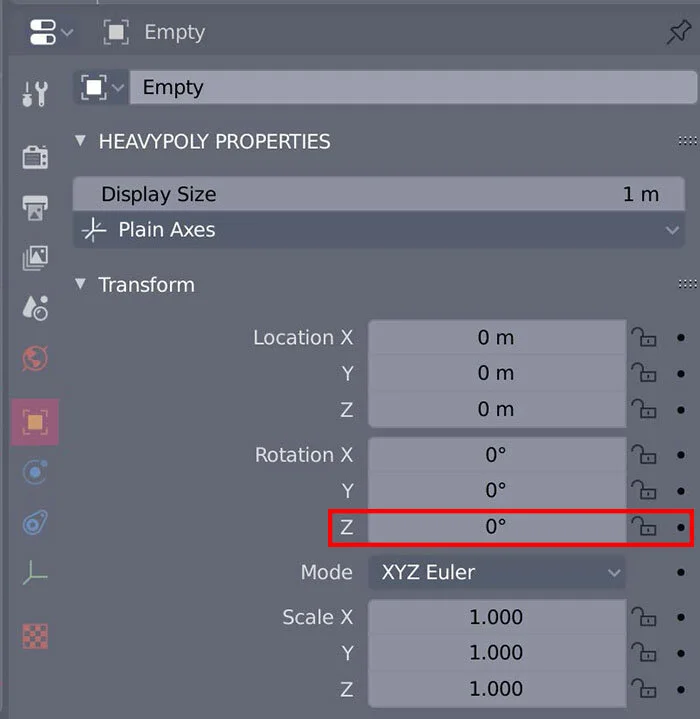
6. With the empty axis selected in the 3D animation tab, set the rotation path within the object properties menu. Add a keyframe by right clicking the rotation z axis and selecting Insert Keyframes.

7. Set z rotation to 360 at frame 101. Change z rotation value to 360. Add a keyframe by right clicking the rotation z axis and selecting Insert Keyframes.

8. Set keyframe interpolation to linear. Open Graph Editor under Editor Type. [T] Set Keyframe Interpolation to linear to maintain constant speed.
Exporting renders
There are two methods of exporting rendered animations in blender: video files and exporting individual rendered frames. The recommended technique is to export an animation as individually rendered frames. This method is faster as Blender doesn’t have to compile the files into a container but this has a long post render process. Exporting individual files is desired for large projects as complex renders can crash and as the individual renders are already stored the render can continue from the previous frame.
Small, short or simple animations can be exported as a video file. This involves blender rendering out each frame into a container and exporting said container as a video file. The following section outlines the export process for the video files.

1. Adjust sampling size. The same as rendering an image, increasing the render and viewport value will increase the resolution of the final render.
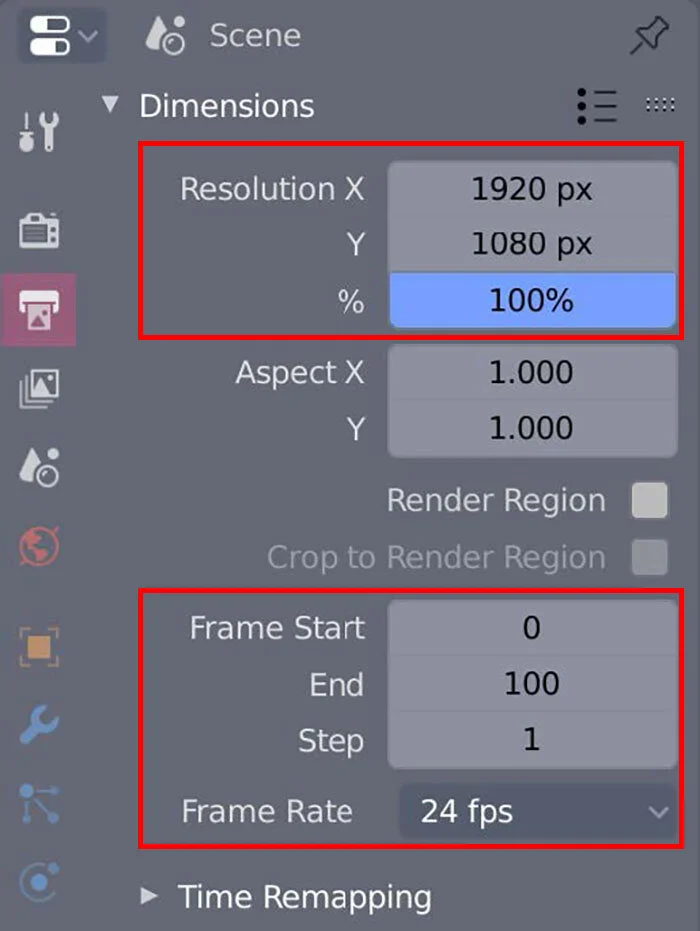
2. Set render dimensions. The dimensions outline the size of the final render.1920 x 1080px - also referred to as 1080p - is the current standard screen resolution for computers.
3. Correct frame values. Ensure that the frame start and end encompasses the entire animation sequence while the frame rate dictates the number of frames played per second (fps). 24 fps is the industry standard.
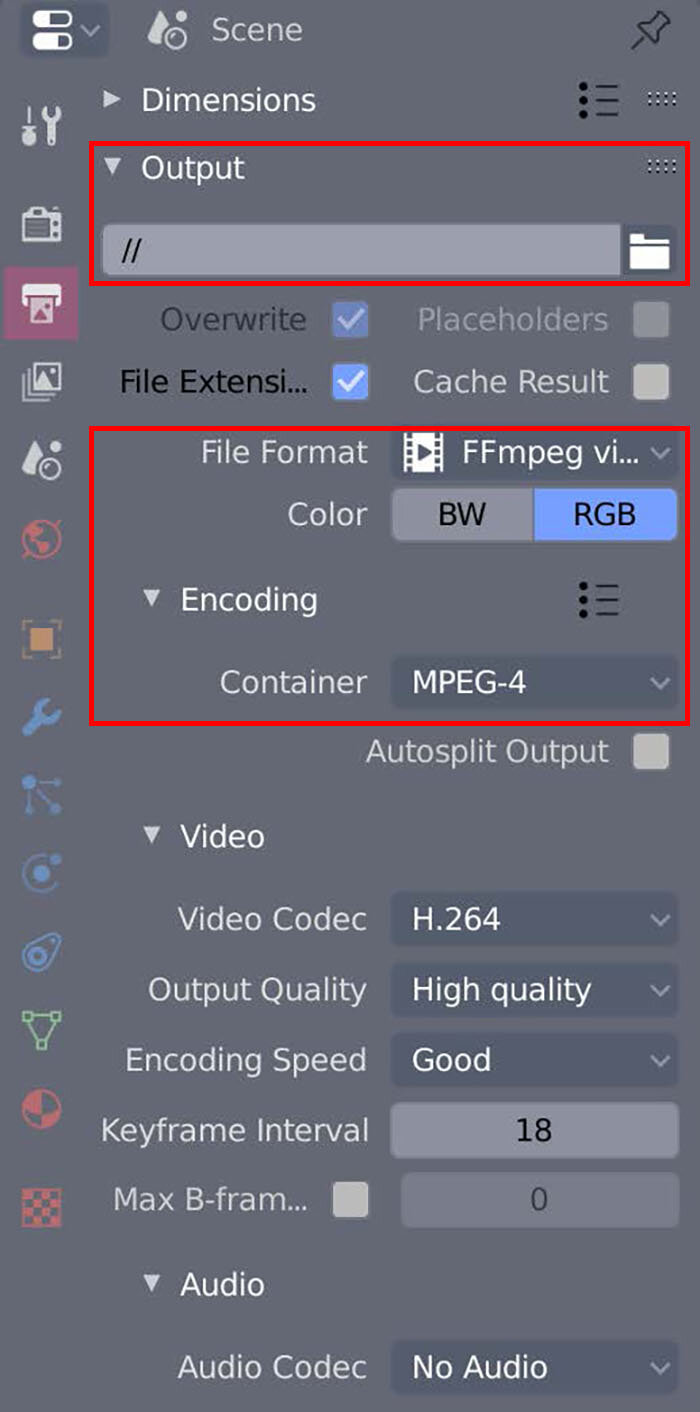
4. Set directory location. Using the folder icon, set the directory location for where the animation container will be saved.
5. Adjust file format to FFmeg video. Changing the file format from an image file to a video file will ensure that Blender compiles the frames into a container. Setting the file type as an FFmpeg opens an Encoding tab where the type of video file can be specified.
Thanks for reading!
Ellie McBain
BMW Group + QUT Design Academy Intern 2020